Aftercare

Introduction

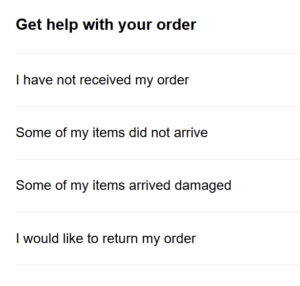
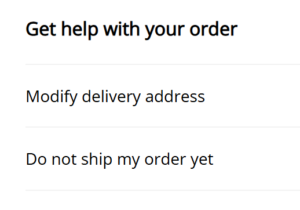
Aftercare is one of the unique tools we offer to our customers to enhance their consumers’ post purchase experience. It’s essentially a branded tracking page which allows customers to track orders, manage returns and self-serve common issues like editing shipping addresses.


Aftercare Intro 1
Aftercare Intro 2

There are 3 key areas on our portal which you need to complete in order to set up your Aftercare. -Returns – Branding and -Aftercare. They are all located in the Settings tab.

Settings / Returns

To access this menu go to Settings > Returns.

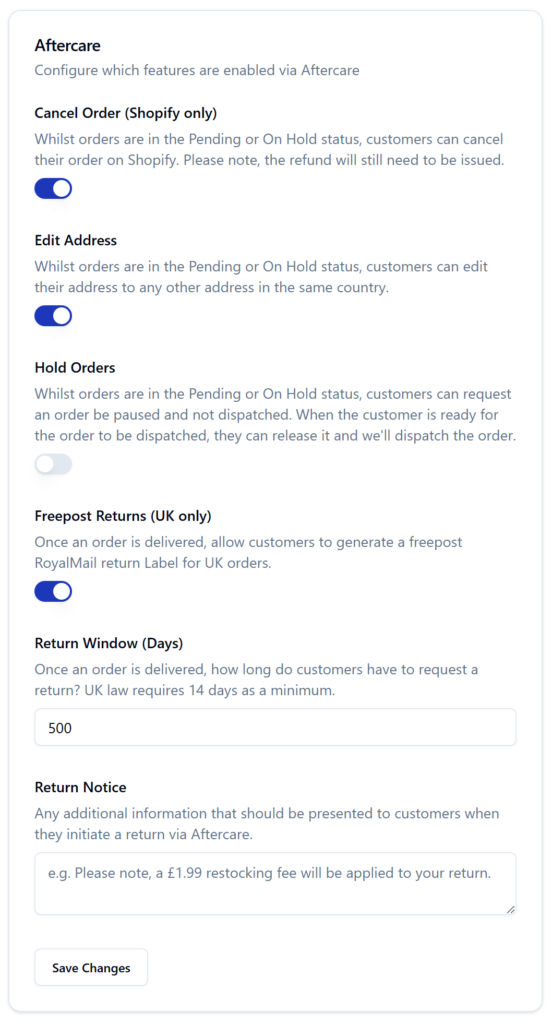
1. What should we do with your damaged returns? You have 2 options:- Keep them or Discard them.                                       

2. Which return options should be available to your customers? There are 3 options:- Refund, Store Credit or Replacement. For example, if you only offer refunds to your customers when they are returning items then you would untick Store Credit and Replacement.                         

3. Which return reasons should your customers pick from? This option is really good if you want feedback from your customers. For example, if you were a clothing brand you may want to have options like 1. It is too big 2. It is too small 3. I don’t like how it looks on me, etc. To add reasons just click the Add button > input reasons and click submit.

Setting - Returns

Settings / Branding

To set up your branded aftercare please follow these steps:-

  1. In the portal go to Settings > Branding
  2. Select font style from dropdown menu
  3. To select the colour of the ‘Submit’ box input Colour (Hex Code).
  4. Choose Logo by clicking the ‘choose file’ button
  5. Choose Favicon by clicking the ‘choose file’ button
  6. Choose Banner Image by clicking the ‘choose file’ button.
  7. If you want to see how the Aftercare looks click the ‘Preview in new tab’ link on the right hand side of the page.

What is a Favicon?

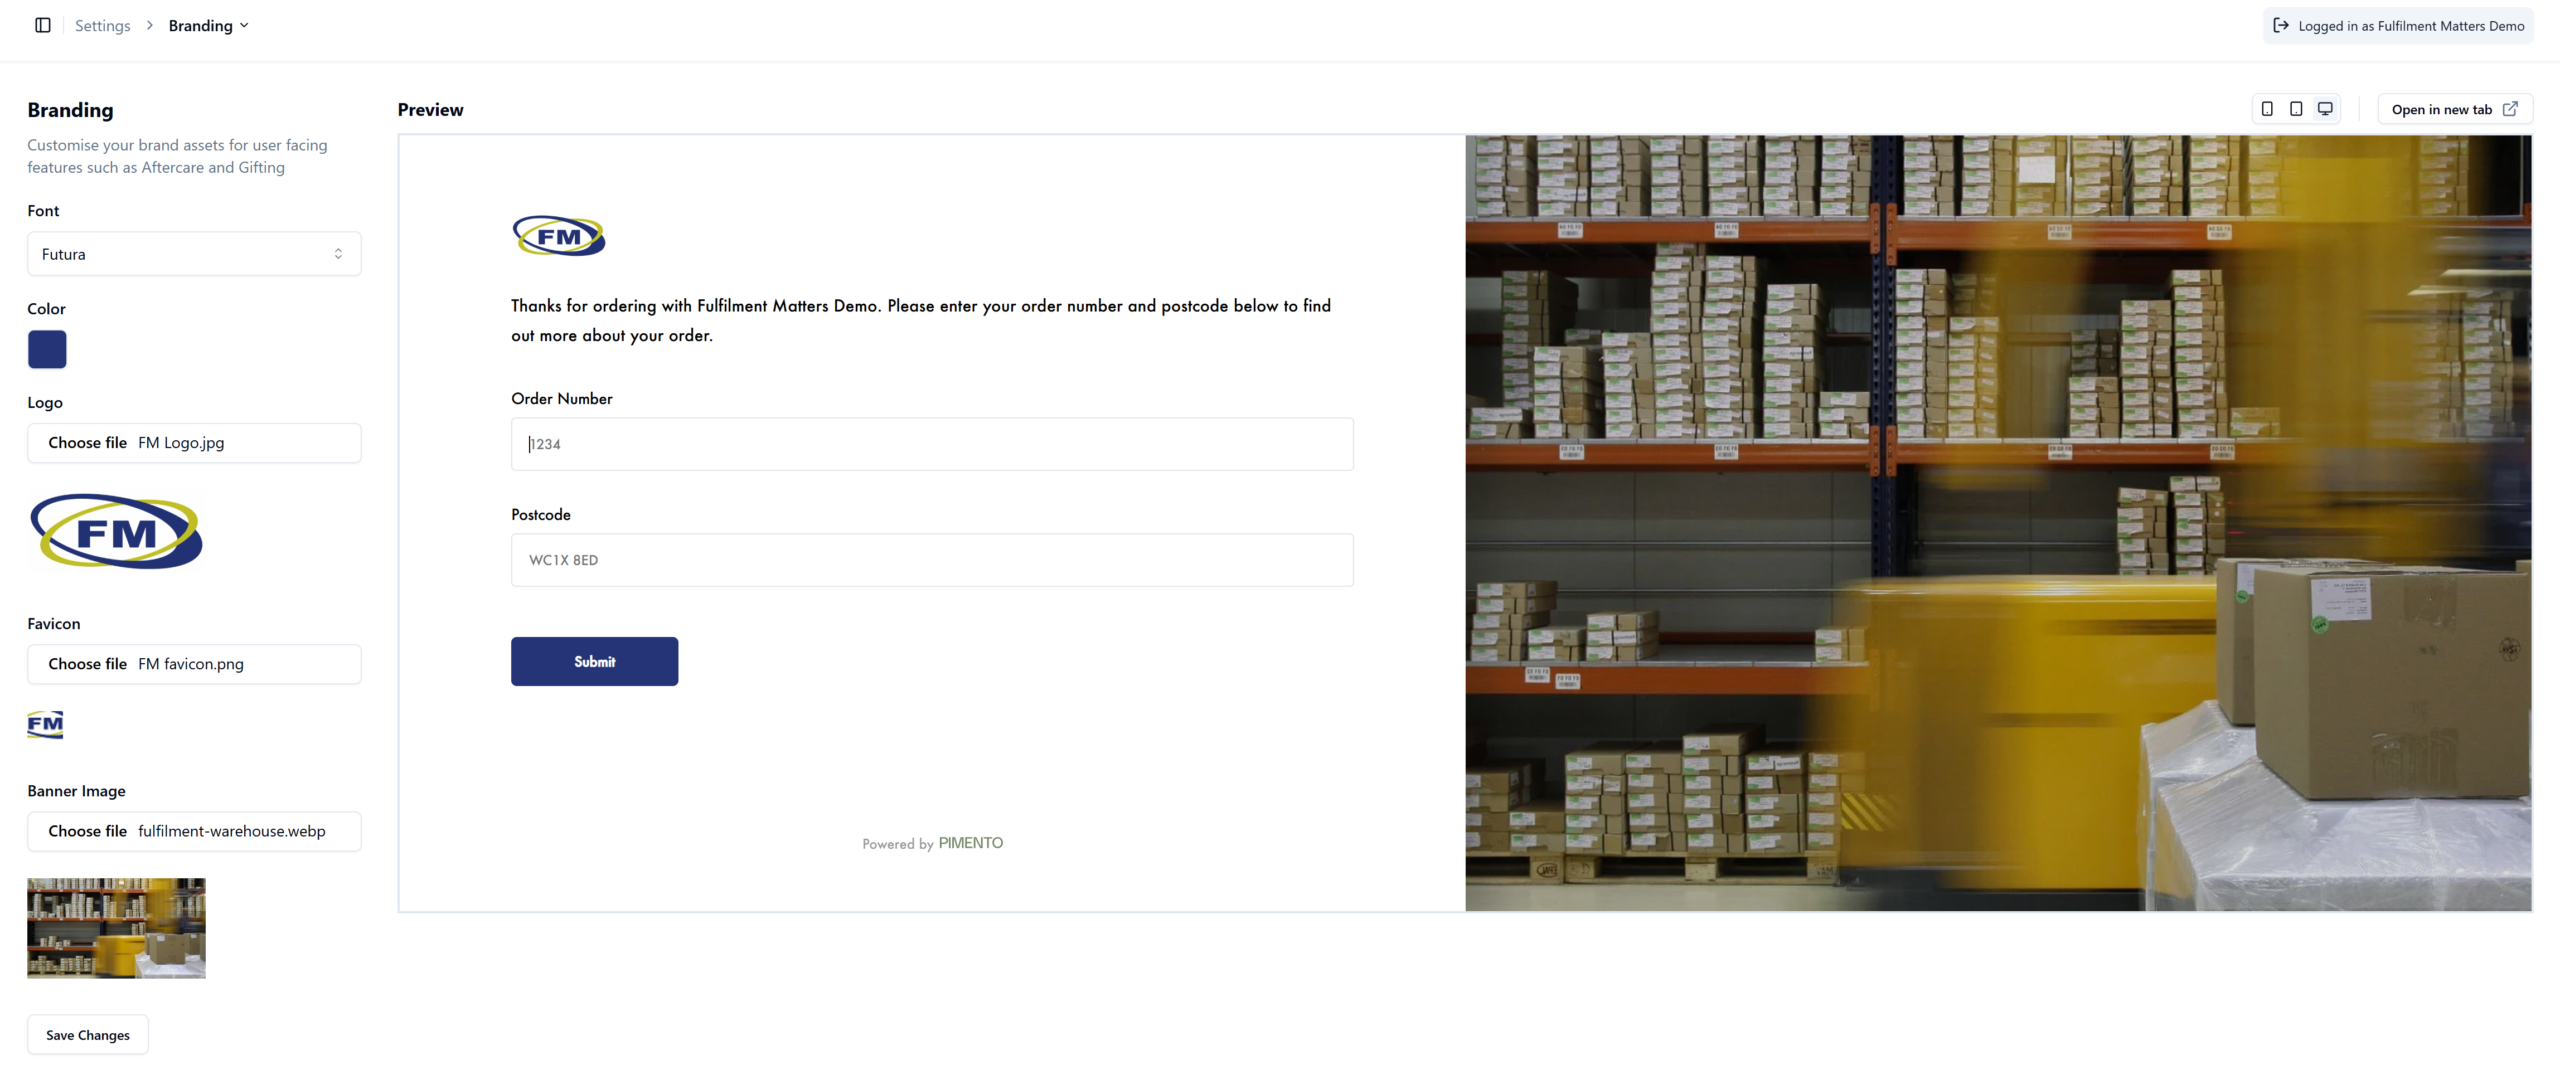
It is a small website/tab icon which can be found in your browser tab when visiting a page. See examples below of some popular favicons.


I do not know the hex code for the colour I want.

You can either google hex code for the colour Black or Blue or if there is a specific colour you had in mind you can download a chrome extension called ColorZilla which allows you to select a colour on a website or image and it will give you the hex code.


What type of files can I upload for the Logo, Favicon and Banner image?

JPG, JPEG, PNG, GIF, WEBP

Settings / Aftercare

To access this menu go to Settings > Aftercare and toggle on and off which features you would like your customers to have access to.

  1. Cancel Order (Shopify Only) – Whilst orders are in the Processing or On Hold status, customers can cancel their order on Shopify. Please note, the refund will still need to be issued by the brand.
  2. Edit Address – Whilst orders are in the Processing or On Hold status, customers can edit their address.
  3. Hold Orders – Whilst orders are in the Processing or On Hold status, customers can request an order be paused and not dispatched. When the customer is ready for the order to be dispatched, they can release it and we’ll dispatch the order.
  4. Freepost Returns (UK Only) – Once an order is delivered, allow customers to generate a freepost Royal Mail return Label for UK orders.
  5. Return Window (Days) – Once an order is delivered, how long do customers have to request a return? UK law requires 14 days as a minimum

Aftercare Features

Features

  • Cancel Order – explained in the Settings/Aftercare tab.
  • Edit Shipping Address – explained in the Settings/Aftercare tab.
  • Hold Orders – explained in the Settings/Aftercare tab.
  • Track orders – Once the order has been shipped the customer will be able to track their order by clicking ‘Track my delivery’ on their Aftercare page.
  • Report an order as Lost – If an order has been lost a customer can report it by clicking ‘I have not received my order’ then selecting ‘Please launch an investigation.’ If the parcel turns up afterwards, the customer can go back into the Aftercare and select ‘I found my delivery.’
  • Report items missing in order – customers can do this by selecting ‘Some of my items did not arrive’ > they choose from 3 options as to the condition the parcel arrived in > then they select the item or items which are missing.
  • Report items arrived damaged – customer clicks ‘some of my items arrived damaged’ > they choose from 3 options as to the condition the parcel arrived in > then they select which item or items were damaged > upload image of damaged items and they can put additional information in the text box and Submit.
  • Making a return – Customer clicks ‘I would like to return my order’> they choose which item or items they would like to return > they choose their reason for returning the item > choose refund method > Then the customer can either download the return label if you the brand has that feature enabled. If that isn’t enabled the customer would need to write down our Return Address on the package > They can book a collection and it will redirect them to the Royal Mail website so they can input their collection address and input the day and time of collection.


Please note – You can manage any issues you customer report in the portal

  1. Features 5 to 7 once a customer reports an issue you can view it in your Pimento portal by going to Issues tab and clicking All.
  2. Feature 8 – you can view all the returns on your portal by clicking the Returns tab.

Connecting Your Store

Importance Notice:

If you are not comfortable altering HTML code then please do contact us for help and we can arrange for out IT to help via a screen share/remote connection. 

Shopify

  1. In Shopify click Settings > Go to Notifications > Click Customer notifications
  2. Click Order Confirmation > then go to Edit Code
  3. Click inside the email body text box and click CTRL + F for Windows or Command + F for Mac
  4. In the ‘find’ box type in view your order and in the replace box type in Manage Your Order and click Replace All. Scroll to the top of the page and click preview to ensure the View Your Order button has changed to ManageYour Order.
  5. Close Preview box and click back into the email body
  6. Click CTRL + F or Command + F again. In the find box, copy and paste {{ order_status_url }}
  7. In the replace box, copy and paste https://aftercare.getpimento.com/your-company-name?order={{ order_number }}&postcode={{ shipping_address.zip }}. The red highlighted area needs to be replaced with your company name as it appears on your account. For example if your company name was ‘Fulfilment Matters Ltd’ then your-company-name would be replaced by fulfilment-matters-ltd. Once you have your link correct like: https://aftercare.getpimento.com/fulfilment-matters-ltd?order={{ order_number }}&postcode={{ shipping_address.zip }}Hit ‘replace all‘.
  8. Scroll to the top of the page and click Preview. Click send test email so you can see if everything works
  9. In the test email when you click the Manage Your Order Button it should take you to your branded Aftercare Page (you won’t see actual tracking, it should just take you to the url). If it does, then the coding you did earlier was successful.
  10. Click Save and close Settings Box by clicking the small X in the upper right corner.
  11. Repeat Steps 1 to 10 to link Aftercare to the Shipping Confirmation emails.


Any issues, then please do not hesitate to contact us for help.

Go to Settings > Branding > Open in new tab (top right)

you should see it in your browser URL. The start of the URL should look something similar to this:  https://aftercare.getpimento.com/your-company-name but instead of your-company-name it would be your actual company name.