Welcome to our support page.
Here on our support page is a guide to get you started on our WMS.
Please use the sub menu below to check out some of the areas on our WMS.
Orders
The orders page is without a doubt the most visited page on the WMS system, it is where the magic happens! This is where you have visibility of D2C (Direct to Consumer) and B2B (Business to Business) orders including the current status of them. There are multiple searching field options so you can toggle clearly what information you are looking for:.
Status
There is a Status field and here you can select the below options to filter your search:
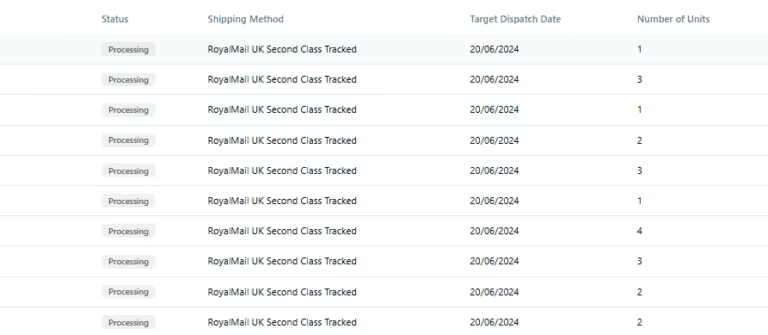
Processing: When an order is in a processing state, it means that it is awaiting to be picked by the warehouse team. This is the status when an orders pulls through from a sales channel or has ben created manually. You can edit things such as the items in the order, quantity, customs value shipping address and shipping method.
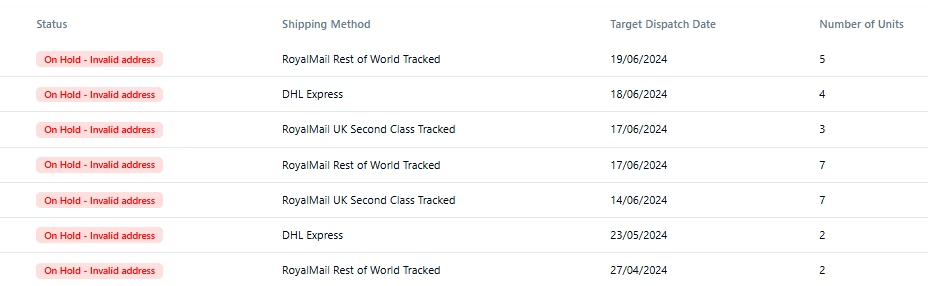
On Hold: From on hold, you can also filter this further using the ‘+ On Hold Reason’ by selecting reasons like Awaiting Payment, Inventory Unavailable, Missing Customs Value, Review Required, Fraud Risk, Invalid Address or Invalid Shipping Method. By filtering these orders it will allow you to only see those orders that need attention or tweaking.
Picked: This means that the order has been physically picked in the warehouse and will shortly be packed. At this stage the order contents can not be edited although you can still edit the shipping address, shipping method and customs value.
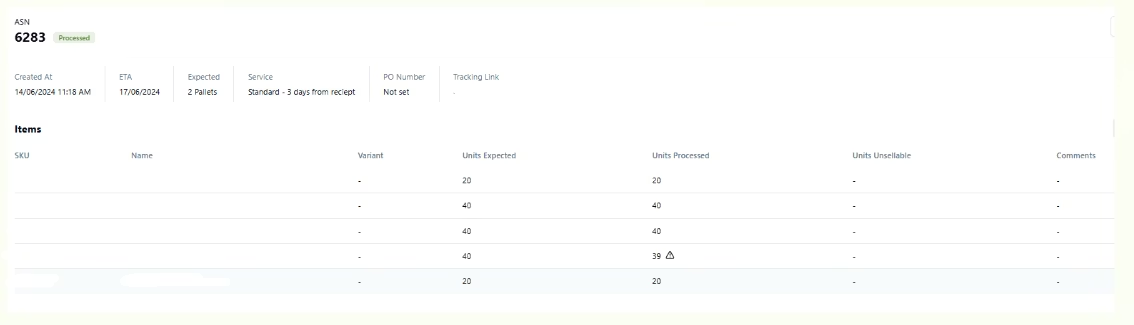
Packed: Orders mostly do not stay in this status for a long period of time as the order usually goes straight to shipped.
Shipped: The order has been completed and will be handed over to the courier. To filter this down further you can select the ‘+ Delivery Status’ button and it will show status’s such as Shipped-Pending (awaiting to be scanned into the couriers network) In-Transit, Returned, Failed, Delivered or Shipped Unavailable (untracked service has been used and there is no tracking information available.)
Cancelled: Order has been cancelled in Pimento. Please note that any order cancelled in a sales channel ie Shopify will not automatically cancel it in Pimento, it will need to be done within the system using the ‘Edit Status’ button.
Channel
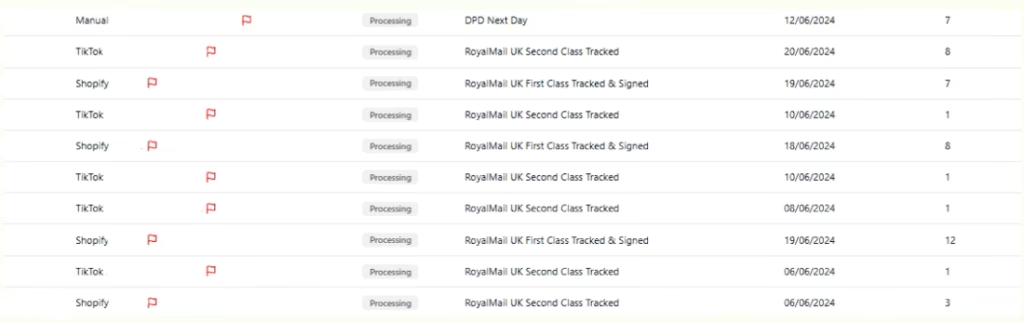
On this field you can filter to which channel of order you wish to see, for example if you use Shopify, TikTok and Etsy for your brand, you can select a specific channel such as TikTok, you can then filter them further to search On Hold – Invalid Address TikTok Orders orders to action. This function is helpful as it allows you to have the option to filter the orders vs the orders page which is mixed as the orders pull through to Pimento.
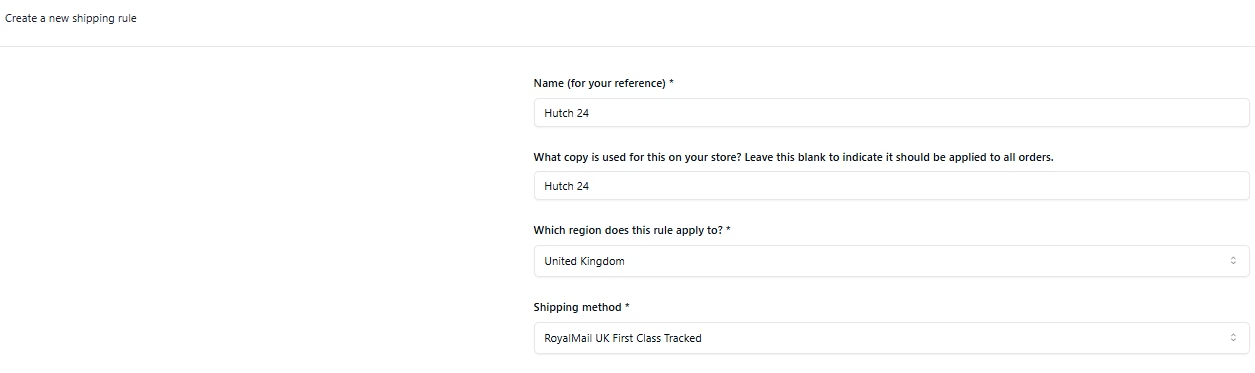
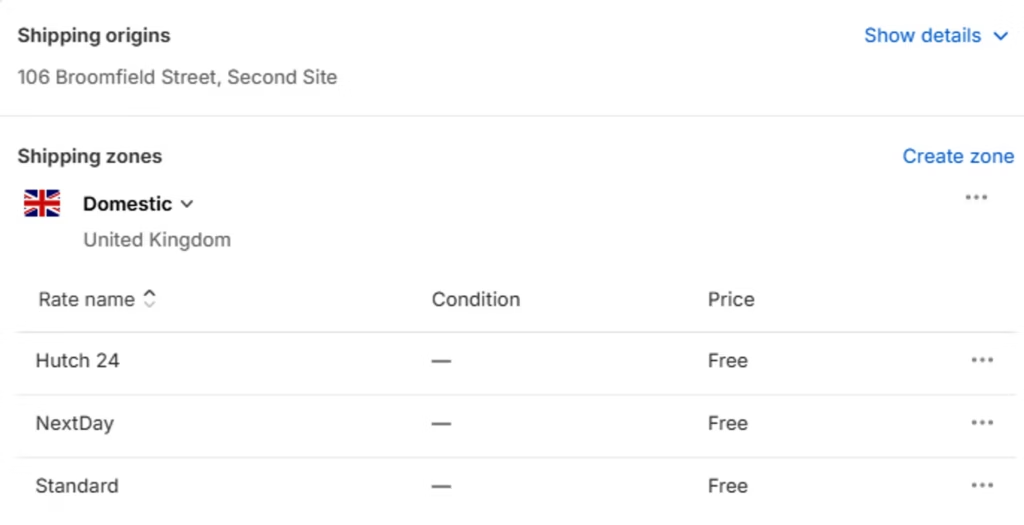
Shipping
Here you can select any shipping option and orders with this on the order will show, for example you could filter Royal Mail Second Class Tracked (Tracked 48) to see how many orders are being sent on that service or alternatively you can see which orders have been marked as Collection, this one is mainly used for B2B (Business to Business) orders.
Priority
Priority: This is where the flag has been added to orders which prioritises the stock allocation to those orders so they are dispatched first. (The flag appears at the end of the order number.)Standard: Orders that do not have the priority function.
Product
There is a drop down and it will show all the products and inserts in your inventory, for ease or brands with a high amount of SKU’s there is also a search bar function. This allows you to search for stock allocated in orders, for example you can filter Shipped/Intensive Hair Mask and it will show you all the orders that have been shipped with that SKU within the order or use it to see what orders are being held up due to lack of inventory, On-Hold/Shampoo Bar Green (45 results).
Create an order
You can create a manual order, you will just need to fill out the basic information that comes up such as reference (this can be a order number you input) shipping method, shipping address and then at the bottom you can add the SKUs you wish to be in the order. If you are uploading a bulk of orders you can use the ‘upload CSV’ feature – you will need to download ‘csv file’ and ensure the orders are in the correct format for them to pull through to the Pimento system.
Fields
These can be located on the top right of the orders page and are used to filter down orders even further such as Customer First Name, Shipping Line One, Postcode, Customs Value, Channel Tags, Shipping Method and Country just to name a few!
Inventory
Here the inventory page will show all products (SKU’s) we have on Pimento with the stock levels attached.
Stock
Using the Stock field search you can filter your search easier – especially if there are alot of products!
In Stock: This means the total number of units we have in the warehouse either in frontstock (stock is located in a picking bin where orders are picked from) or backstock (stock is located in a pallet location)
Units Sold: This shows the amount of units that have been ‘sold’ (reserved) for an order – for example if you have 20 units of Lipstick but 10 are in an order it would show as 10 units sold
Units Available: This indicates how many units are available to be added to new orders
Out of Stock: This feature was added to be able to clearly see what skus we do not have stock for, this is most commonly used for replenishing stock to the warehouse. Something that can also do this is ‘Inventory Out Forecast’ – the system uses the last 4 weeks of sales trends to predict how long the stock will last, ie 2 weeks or 3 months. Another option is to utilise the ‘Inventory Threshold’, this can be found within the information of a product. You can set this as a custom or use the Pimento default.
Inventory Condition:
We ensure that clients have visibility of both sellable and unsellable stock – here you can toggle between both conditions.
Deleted Skus (Hidden):
Sometimes as clients change up the products or as selected lines become discontinued there is the feature to delete products from the inventory page (these are just hidden so it keeps everything tidy) – You can always restore these skus/have visibility of them by using this field.
Creating New Products:
You would just fill out the information shown below and hit submit, or alternatively you can bulk upload products. Top Tip: Download the CSV file first and ensure the orders are in the correct format of the file so it uploads correctly to the system!
Bundles
Using the bundles feature on Pimento allows you to sell multiple skus/units in one place! How to set up: Enter the name of the bundle and choose a sku, then add the products and units within that bundle and then submit!
The system will do all the heavy lifts of working out how many bundles can be sold with the inventory levels you currently have in the warehouse. It will look something like this:
Inserts
Inserts can come in many different forms such as stickers, card inserts often known as Thank You Cards, tissue paper or sweets. Anything that is an addition with no money value. Brands will often add a Thank You Card or Instructions Card to orders. It can be automatically set up using Workflows to add this into each order when it comes into Pimento. Below you can see where a chocolate is being used as an insert and in what cases the client would like it to be added to orders.
Issues
This is a tab that we hope you do not have to use but feel that by being able to log an issue orders it allows visibility into what could be affecting brand and customer satisfaction. Below shows that when an issue is logged it gets added to this data sheet for the month, highlighted also is a breakdown in the month issues that was either logged by the end customer or the client.
You can add an issue for many reasons as shown above, the customer could of made a mistake when ordering, damage or loss via the courier company or even where the customer expected a different item in the parcel. Pimento monitors the reasons that have been selected when creating issues and it then looks at the 3PL’s (Third Party Logistics) accuracy when dispatching orders.
Returns
The returns tab filters any expected, received or processed returns. You can click into each order and know what was expected in the order, the warehouse team can say what stock that actually received back and if it restocked into sellable or unsellable inventory. If for any reason the product can not be restocked then the warehouse team will add a comment on what the issue is and add images so brands can pass this onto the customer if they are enquiring for a refund.
There is also a ‘Actioned’ feature where brands can tick if the customer has been refunded or not to allow as much visibility as possible when looking at the returns tab. In Settings>Returns you can also add/choose which ‘Refund Methods’ you wish to offer your customer, this could be Store Credit or even Replacement.
Send Inventory
Here you can submit an ASN (Advanced Shipping Notice) onto Pimento, this essentially allows the warehouse team to have notice of your shipment coming into the warehouse. Especially if you would like your shipment rushes when it arrives, we ask for as much notice as possible!
To create an ASN, click on Send Inventory -> Lists -> +Create ASN
When you click into the ASN, it will show something similar to the below, the ‘Units Expected’ is what was submitted at the time of creating the ASN and ‘Units Processed’ is what the warehouse team counted when the shipment was being processed in. Any discrepancies will show a warning sign to alert you of the discrepancy. If anything arrives to us in an unsellable way, similar to returns the warehouse team will add a comment and attach any images so you have visibility of the condition of the stock.
It is good practice to add tracking information to an ASN and always keep the estimated time of arrival up to date using the edit button. This then keeps the warehouse team up to also!
Shipping Rules
These are created normally at the time of onboarding to ensure that orders from a sales channel pull through to Pimento and get dispatched on the correct shipping method.
In Shopify for example, the ‘Rate Name’ needs to get inputted into Pimento under ‘Copy’ as this is what matches them together. You can then filter to say if the shipping rule you are creating is for the UK and what shipping method you would like it to be dispatched onto.
Aftercare
Introduction
Aftercare is one of the unique tools we offer to our customers to enhance their consumers’ post purchase experience. It’s essentially a branded tracking page which allows customers to track orders, manage returns and self-serve common issues like editing shipping addresses.
There are 3 key areas on our portal which you need to complete in order to set up your Aftercare. -Returns – Branding and -Aftercare. They are all located in the Settings tab.
Settings / Returns
To access this menu go to Settings > Returns.
1. What should we do with your damaged returns? You have 2 options:- Keep them or Discard them.
2. Which return options should be available to your customers? There are 3 options:- Refund, Store Credit or Replacement. For example, if you only offer refunds to your customers when they are returning items then you would untick Store Credit and Replacement.
3. Which return reasons should your customers pick from? This option is really good if you want feedback from your customers. For example, if you were a clothing brand you may want to have options like 1. It is too big 2. It is too small 3. I don’t like how it looks on me, etc. To add reasons just click the Add button > input reasons and click submit.
Settings / Branding
To set up your branded aftercare please follow these steps:-
- In the portal go to Settings > Branding
- Select font style from dropdown menu
- To select the colour of the ‘Submit’ box input Colour (Hex Code).
- Choose Logo by clicking the ‘choose file’ button
- Choose Favicon by clicking the ‘choose file’ button
- Choose Banner Image by clicking the ‘choose file’ button.
- If you want to see how the Aftercare looks click the ‘Preview in new tab’ link on the right hand side of the page.
What is a Favicon?
It is a small website/tab icon which can be found in your browser tab when visiting a page. See examples below of some popular favicons.
I do not know the hex code for the colour I want.
You can either google hex code for the colour Black or Blue or if there is a specific colour you had in mind you can download a chrome extension called ColorZilla which allows you to select a colour on a website or image and it will give you the hex code.
What type of files can I upload for the Logo, Favicon and Banner image?
JPG, JPEG, PNG, GIF, WEBP
Settings / Aftercare
To access this menu go to Settings > Aftercare and toggle on and off which features you would like your customers to have access to.
- Cancel Order (Shopify Only) – Whilst orders are in the Processing or On Hold status, customers can cancel their order on Shopify. Please note, the refund will still need to be issued by the brand.
- Edit Address – Whilst orders are in the Processing or On Hold status, customers can edit their address.
- Hold Orders – Whilst orders are in the Processing or On Hold status, customers can request an order be paused and not dispatched. When the customer is ready for the order to be dispatched, they can release it and we’ll dispatch the order.
- Freepost Returns (UK Only) – Once an order is delivered, allow customers to generate a freepost Royal Mail return Label for UK orders.
- Return Window (Days) – Once an order is delivered, how long do customers have to request a return? UK law requires 14 days as a minimum
Aftercare Features
Features
- Cancel Order – explained in the Settings/Aftercare tab.
- Edit Shipping Address – explained in the Settings/Aftercare tab.
- Hold Orders – explained in the Settings/Aftercare tab.
- Track orders – Once the order has been shipped the customer will be able to track their order by clicking ‘Track my delivery’ on their Aftercare page.
- Report an order as Lost – If an order has been lost a customer can report it by clicking ‘I have not received my order’ then selecting ‘Please launch an investigation.’ If the parcel turns up afterwards, the customer can go back into the Aftercare and select ‘I found my delivery.’
- Report items missing in order – customers can do this by selecting ‘Some of my items did not arrive’ > they choose from 3 options as to the condition the parcel arrived in > then they select the item or items which are missing.
- Report items arrived damaged – customer clicks ‘some of my items arrived damaged’ > they choose from 3 options as to the condition the parcel arrived in > then they select which item or items were damaged > upload image of damaged items and they can put additional information in the text box and Submit.
- Making a return – Customer clicks ‘I would like to return my order’> they choose which item or items they would like to return > they choose their reason for returning the item > choose refund method > Then the customer can either download the return label if you the brand has that feature enabled. If that isn’t enabled the customer would need to write down our Return Address on the package > They can book a collection and it will redirect them to the Royal Mail website so they can input their collection address and input the day and time of collection.
Please note – You can manage any issues you customer report in the portal
- Features 5 to 7 once a customer reports an issue you can view it in your Pimento portal by going to Issues tab and clicking All.
- Feature 8 – you can view all the returns on your portal by clicking the Returns tab.
Connecting Your Store
Importance Notice:
If you are not comfortable altering HTML code then please do contact us for help and we can arrange for out IT to help via a screen share/remote connection.
Shopify
- In Shopify click Settings > Go to Notifications > Click Customer notifications
- Click Order Confirmation > then go to Edit Code
- Click inside the email body text box and click CTRL + F for Windows or Command + F for Mac
- In the ‘find’ box type in view your order and in the replace box type in Manage Your Order and click Replace All. Scroll to the top of the page and click preview to ensure the View Your Order button has changed to ManageYour Order.
- Close Preview box and click back into the email body
- Click CTRL + F or Command + F again. In the find box, copy and paste {{ order_status_url }}
- In the replace box, copy and paste https://aftercare.getpimento.com/your-company-name?order={{ order_number }}&postcode={{ shipping_address.zip }}. The red highlighted area needs to be replaced with your company name as it appears on your account. For example if your company name was ‘Fulfilment Matters Ltd’ then your-company-name would be replaced by fulfilment-matters-ltd. Once you have your link correct like: https://aftercare.getpimento.com/fulfilment-matters-ltd?order={{ order_number }}&postcode={{ shipping_address.zip }} – Hit ‘replace all‘.
- Scroll to the top of the page and click Preview. Click send test email so you can see if everything works
- In the test email when you click the Manage Your Order Button it should take you to your branded Aftercare Page (you won’t see actual tracking, it should just take you to the url). If it does, then the coding you did earlier was successful.
- Click Save and close Settings Box by clicking the small X in the upper right corner.
- Repeat Steps 1 to 10 to link Aftercare to the Shipping Confirmation emails.
Any issues, then please do not hesitate to contact us for help.
How do I find my Aftercare link?
Go to Settings > Branding > Open in new tab (top right)
you should see it in your browser URL. The start of the URL should look something similar to this: https://aftercare.getpimento.com/your-company-name but instead of your-company-name it would be your actual company name.
Fulfilling Expectations
Whether your requirements are relatively modest, or you have thousands of items per day, rest assured that we can help.